Friday, December 20, 2019

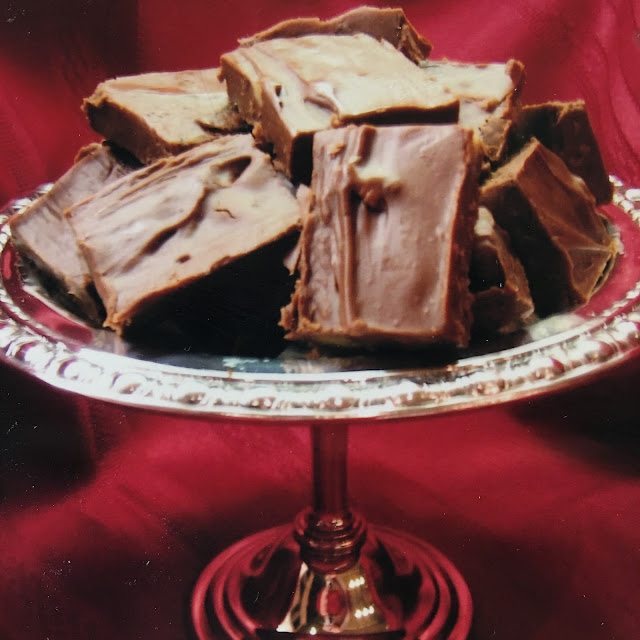
Grandma's Rocky Road Fudge


Grandma's Rocky Road Fudge
1 package semi-sweet chocolate chips
1 can sweetened condensed milk
2 tbsp. butter
2 cups peanuts
1 bag (10.5 oz) mini marshmallows

Melt chocolate chips, sweetened condensed milk, and butter in a double boiler. Mix peanutes, and miniature marshmallows together in a large bowl. Fold in the melted chocolate mixture. Spread in a lightly buttered pan. Cool until set. Cut into squares.

White Chocolate Orange Truffles

I found this basic recipe several years ago and decided that it would be so much better white white chocolate instead of semi-sweet. This has since become a holiday favorite for me. You know I love orange and these are so light and fluffy in the center that they literally melt in your mouth.

White Chocolate Orange Truffles
2 packages of white chocolate chips
3/4 cup whipping cream
1 tsp finely grated orange zest
2 tsp orange extract
1 cup (6 oz) white chocolate for coating

Place white chocolate chips in a mixing bowl; set asie, In a saifcepan, bring cream and orange peel to a gently boil. Immediately pour over chips. Let stand for one minute. Whisk until smooth. Add the extract. Cover and chill for 30 minutes or until mixture begins to thicken. Beat for 10-15 seconds or just until mixture lightens in color. I use and electric mixer but am careful not to over beat. Scoop the mixture out using a small cookie scoop onto parchment or wax paper- line baking sheets. Cover and Chill for 15 minutes. I put them in the freezer.
In a double boiler, melt white chocolate until smooth. Dip the cold truffle balls into the melted chocolate and return to waxed paper to harden. Store in an air tight container in the refrigerator.
Yield: 6 dozen

Remarkable Fudge

This is my dad's favorite fudge. My mom found the recipe in the 1960's in a cookbook she got with her S&H food stamps. It's super good and doesn't stay around long that's for sure. It was always a favorite of the UPS guys and our mailmen too!

Remarkable Fudge
4 cups granulated sugar
1 can evaporated milk
1 cup butter
1 pint marshmallow cream
1 pkg semi-sweet chocolate chips
1 tsp vanilla
1 cup chopped nuts (my dad likes walnuts)

Add sugar, evaporated milk, and butter into a heavy 3 qt sauce pan. Cook over medium heat, stirring to soft ball stage (236 degrees on a candy thermometer.) Remover from heat. Add chocolate Chips, marshmallow cream, vanilla, and nuts. Por into a butter pan, spread out evenly. Cool to set. Then cut in to squares to serve.


Monday, December 16, 2019

Almond Roca - A Family Favorite

Another family favorite for Christmas is Almond Roca or Toffee. It is so good and pretty easy to make. This is my mom's recipe and it is best made in a nice heavy, cast iron pot. I inherited mine from my Grandma. Every year we would make trays of yummy cheese balls and candies to take to friends and relatives around town. This was always something we put on the trays. My mom learned to make this as a young woman and taught us to make it at a young age so that none of us ever use a recipe anymore.

Almond Roca
1 cup real butter
1 cup granulated sugar
1/2 cup finely chopped almonds ( or any other nut)
1/2 large chocolate bar (milk, semi-sweet or dark, it doesn't matter)
more chopped almonds for the top

Cook the butter and sugar in a heavy pot on medium heat, stirring constantly. Cook to the hard ball stage either using a thermometer or when dropped into cold water. To see the cold water method, ready to the end. Remove from heat. Stir in chopped nuts. Pour immediately onto a lightly buttered cookie sheet. Set chocolate square on top of hot candy once it is partially set. once it melts, spread it across all of the candy and then sprinkle the remaining chopped nuts on the top. Let cool and let chocolate solidify again and then break into pieces to serve.
This is what it looks like as it begins to cook.
It will slowly begin to brown.
You can see it slowly moves toward a caramel color.
This is almost there and you might be tempted to stop here, but keep going.
This is right. you can see around the edges that it is really caramelizing.
Turn off the heat and add the chopped nuts. When I made this I only had sliced almonds so I just went with it.
After you spread the candy on a baking sheet, put the chocolate on it and let it melt.
Then spread the chocolate across the top of the candy
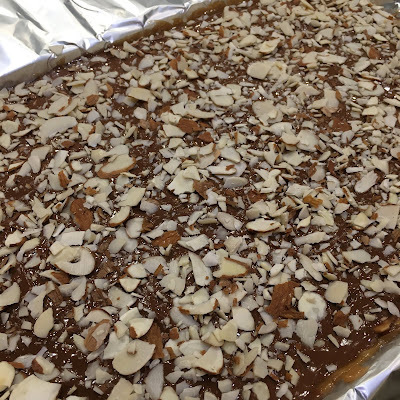
And sprinkle it with more chopped nuts (again I had slices almonds, so...)

That's it! Break it up when you are ready to serve it and it has cool enough so the chocolate has set.

Here is a great chart for testing candy "doneness" without a candy thermometer from The Spruce Eats

Saturday, December 14, 2019

Grandma's Cowboy Candy

 Cowboy Candy is a yummy, slightly butterscotchy, caramelly  coconut candy.  I have also heard them called coconut haystacks but there are several variations of haystacks and these have no nuts or chocolate.

I always really liked this one growing up but I'm a big fan of butterscotch and coconut so it's a given I'd like this one.

Grandma's Cowboy Candy

4 cups of granulated sugar
4 cups of coconut
1 can of evaporated milk
1 1/3 cups Light Karo Syrup
Put all ingredients into a heavy pot and cook over medium heat. Stir constantly bringing to a soft ball stage on a candy thermometer or using the cold water method. Let cool, then beat and beat and beat until it is no longer glossy and it is thick. Then drop by spoonfuls onto waxed or parchment paper. If you beat it too long and don't have time to scoop, then spread it out like fudge and cut it when cool.
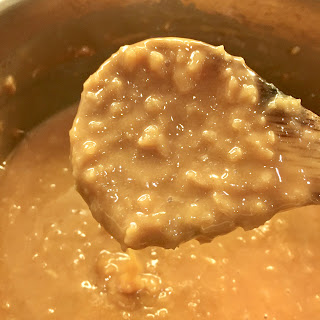
 It turns a really pretty toffee color when it begins to get to the soft ball stage.
 Let it cool.
 I beat my candy in my Kitchen Aid bowls with the paddle. 
 I broke my thermometer and had a tough time getting the water method right, so my cowboy candy got thick super fast and I had to spread it and cut it instead of drop it. It still tastes great though!
Yum! Look and that butterscotchy coconutty goodness!

Grandma's Penuche

 Penuche is brown sugar fudge that has no chocolate in it. It's flavored with brown sugar and vanilla.

This is my grandmother's recipe and she made it every Christmas. It's one of my dad's favorites.

Grandma's Penuche

3 cups of brown sugar
1 cup evaporated milk
2 tablespoons butter
1 1/2 teaspoons vanilla
1 1/2 cups chopped nuts

Put milk and sugar in a heavy pan and cook over medium heat while stirring constantly. Cook to the soft boil stage either using a thermometer or the cold water test method. Remove from heat, add the butter and set aside to cool to a luke warm temperature. Add vanilla and nuts once cooled. Then beat, and beat, and beat until it is light in color and almost set. Spread into a buttered pan. cut once it is set.
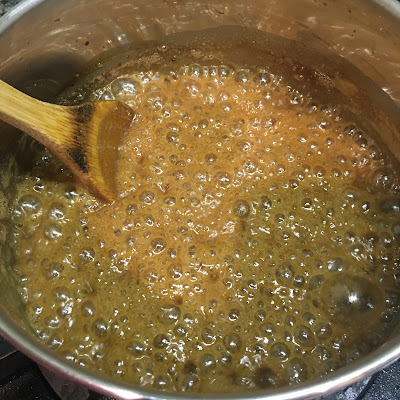
 This is what it looks like as it is boiling.


Grandma's Divinity


My grandma, my dad's mom, was a great cook. She loved cooking for people. So when Christmas came around she started early. Once all of her kids were grown and had children of their own, she would still decorate, make Christmas candies, popcorn balls, rice krispie treats, and even baked and decorated her own gingerbread house from scratch using a hand cut paper pattern. I have one of her gingerbread house designs. It was so much fun to the look at her Gingerbread house and pine for all the candies that were all over it.

She would prepare all year for candy making time, so that when December arrived she could focus for weeks on getting all her candy made. Grandma made a huge variety of candy and she would portion them onto little trays and once cooled would wrap them in plastic wrap and then start on the next candy.  In the end she had a well-stocked candy store with trays of each type of candy for us to take home after the Christmas celebration.

Her boys, (my dad and uncles) were all very vocal about their favorites. Come to think of it, I really don't know what my Aunt's favorite was, but the boys always made their candy choices apparent.

In celebration of my Grandma, and her incredible talent for candy making, I'm going to post some of her candy recipes with pictures of my poor attempt to replicate them.

Today's candy recipe is DIVINITY. This is a difficult candy to master and it is one best made with a Kitchenaid Mixer and candy thermometer at the ready! Divinity is super fussy and the weather can affect the out come as well as not cooking the syrup properly. I put a candy cooking guide at the end of this post for those who do it the old fashioned way.

I wish everyone good luck who tries this. It will come out, but takes some practice and glorious weather.

Grandma's Divinity
2 2/3 cups granulated sugar
2/3 cup Light Karo Syrup
2/3 cup water
2 egg whites
1 tsp. vanilla
1 cup chopped walnuts (or any nut)

In a heavy pan, mix sugar, Karo and water. Cook on med-high heat and boil until it reaches a semi-hard thread in cold water.Remove from heat. In mixer, on high, whip two egg whites to stiff peaks. With mixer on, slowly pour the hot syrup mixture over the stiffly beaten egg whites. I did this in the same bowl on the mixer. Beat until thick. Add vanilla and walnuts.          

Grandma's Note: Rainy or Foggy days the syrup should test with a brittle thread. Sunny days the thread should be easily pliable. Beat until thick enough to spread into a pan.

 Boil stirring contantly
 Check threads. I'd rather cook too long than not long enough.
Set aside to beat egg whites.
 Stiff peaks are when peaks form and stay.
 Slowly pour in syrup while mixer continues. Completely incorporate the syrup into the egg whites.
 Keep beating and cooling until it thickens enough to spread in out.
 I spread it on parchment paper on a cooking pan to cool and set.
 It should come out really light and fluffy. I can't describe it because it is kind of like a homemade marshmallow but isn't anywhere near as sticky. It isn't dense like a fudge. It's just super light, super fluffy, super sweet and has almost no taste. LOL! But it sure is a nostalgic candy. 
I hope you give it a try.

Candy Temperature Chart

Thread begins at 230 F The syrup will make a 2" thread when dropped from a spoon.
Soft Ball begins at 234 F A small amount of syrup dropped into chilled water forms a ball but flattens when picked up with fingers
Firm Ball begins at 244 F The ball will hold its shape and flatten only when pressed.
Hard Ball begins at 250 F The ball is more rigid but still pliable.
Soft Crack begins at 270 F A small amount of syrup is dropped into chilled water, it will separate into threads that will bend when picked up.
Hard Crack begins at 300 F The syrup separates into threads that are hard and brittle.
Caramelized Sugar 310 F to 338 F Between these temperatures the sugar will turn dark golden but will turn black at 350 F.

Grandma's Crazy Cake


This one is an OLD family favorite.
My grandmother was a "cafeteria lady" back when the cafeteria ladies used to actually cook every day. She was in charge of the kitchen at my elementary school and man could she ever cook! She and the ladies often found excellent recipes and then they more than doubled or quadrupled them....they....thirtied or fortied....no.....they.....altered them to feed 300 people.

My mom came across one of Gram's old folders several years ago and in it there are quite a few of those recipes in her hand writing. I'll share them with you sometime, but the one recipe we had been looking for for years wasn't there. No one, it seemed, had Grandma's crazy cake recipe. I asked aunts, uncles and cousins, but to no avail. I called her old coworkers once when I was back home visiting mom, but still, no luck. One day, Mom ran into one of the ladies I had missed calling, and she told mom she had the original cake recipe from the Parade magazine they'd cut it out of. She generously passed it on, yellowed and creased and oh so fragile. I found it interesting that it was so yellowed it is gold, and getting this recipe is like striking gold to me.
This cake is so moist and delicious, I know are just going to love it! Be sure and just use a simple white frosting, as that's all it needs. Although, if you ask my dad, he'll tell you it's best right out of the pan with no frosting at all!

Grandma's Long Lost Crazy Cake Recipe
(or "Real Crazy" Cake by Beth Merriman, Parade Food Editor)

1 1/2 cups sifted all-purpose flour
3 tablespoons breakfast cocoa (although I recommend Special Dark Hersey Baking Cocoa)
1 cup sugar
1 teaspoon baking soda
1/2 teaspoon salt
1 teaspoon vinegar
1 teaspoon vanilla
5 tablespoons salad oil
1 cup water

Sift first five ingredients into a greased 8" square cake pan. Make three depressions in dry ingredients. Pour vinegar into one, vanilla into another, salad oil into the third. Pour water over all. Mix well, until smooth. Bake in moderate over (350 degrees F) 35 minutes. When cool, frost or serve with ice cream and chocolate sauce. Makes nine servings. (Or three if you're my dad!)

Friday, December 06, 2019

Orange Pomander Cookies

I recently posted on my Instagram account about the Trader Joe’s Orange Pomander Cake. It is so, so good! I can't get enough of it.
But tonight I really wanted to make some of the World's Best Gingersnaps. I got an amazing recipe years ago from a lady who posted recipes in an email newsletter before there were blogs, and they are scrumptious. I immediately realized that I had a problem. No molasses. You can't have a really good gingersnap without molasses.

I continued to leaf through a binder where I have collected recipes over the last decade or more, and happened to find one I'd copied from a catering mystery book by Diane Mott Davidson called Honey Gingersnaps. They had promise, but they weren't quite what I was hoping for.  All was not lost though. The honey gingersnaps sparked an idea to try change the recipe into orange pomander cookies.  So here you go, and yes they do taste like a crispy version of the cake.

 Orange Pomander Cookies
Yield 3 Dozen

1/2 cup honey
1 stick butter, softened
1/2 cup brown sugar
1 egg
zest of one orange
2 cups flour
2 tsp. baking soda
1/2 tsp salt
1 tsp. ground cloves

Preheat oven to 375F degrees
  1. Cream first 5 ingredients.
  2. Sift together remaining dry ingredients and mix with wet ingredients until fully incorporated.
  3. Chill for one hour.
  4. Using a small baking scoop or tablespoon, place a drop of dough into a small plate with granulated sugar and roll dough in sugar.
  5. Place on baking sheet covered with parchment (if desired.)
  6. Bake for 12-14 minutes until golden brown and crispy.
  7. Cool on a baking rack to retain crispy texture.
To truly taste like the bread, you can make a vanilla frosting with a 1/4 tsp of cloves and ice the cookies. Yum!

Saturday, January 05, 2013

Grandma's Persimmon Cookies


1 cup of ripe persimmon pulp (smooth, not chunks)
1 tsp baking soda (put through sm. strainer so there are no bitter clumps)
2 cups flour (may need a little more)
1/2 tsp. ground cloves
1/2 tsp. ground nutmeg
1/2 tsp. ground cinnamon
1/2 cup brown sugar (if you like a really sweet cookie you can add up to 1/4 cup more)
1/2 cup butter (not shortening or margarine, only the real deal)
1 egg
1 cup chopped walnuts (opt)
1 cup raisins (opt)

Cream sugar and butter in a large mixing bowl.  Add egg, persimmon, and baking soda. Stir well. Add all dry ingredients.  Add walnuts and raisins last.  Dough should be like a thick cake batter, not like a cookie dough.  Drop by spoonful ( I use a med. Pampered Chef scoop) onto cookie sheet.  Bake at 350 degrees for 12-15 minutes.  Don't over bake or cookies will be dry.  You want these to be soft.

Daddy says these are ok for breakfast because they have persimmon and walnuts.  Just add a glass of milk and you are good to go. ;-)

Saturday, October 20, 2012

World's Best Gingersnaps

I don't normally like gingersnaps, but I LOVE these! They are a little crispy on the outside and slightly chewy on the inside.  So far, everywhere I take these, people love them!

1 1/2 cups Butter (don't substitute for margarine or shortening -- gross)
2 cups sugar
1/2 cup dark molasses
2 eggs
4 cups flour
4 tsp. baking soda
1/2 tsp. salt
2 tsp. cinnamon
2 tsp. ginger
2 tsp. cloves

Cream butter and sugar, add molasses and eggs.  Then add in dry ingredients.  Refrigerate for 1 hour. Shape into balls, flatten slightly and dip one side into sugar.  Place sugar side up on a baking sheet (I use Pampered chef baking stones.) Bake 13-15 minutes at 375, or until browned.  These should end up crispy on the outside and slightly moist and chewy on the inside.

These would be perfect for a fall or winter tea.  A little spicy but not overwhelming.  I know many people love flavored teas, in fact, I just picked up a pumpkin spice Rooibos for my mom that would probably be delightful with these.  I stick with my plain old black tea and I'm happy.  No clashing flavors.  But feel free to experiment and if you have a Trader Joes in your neighborhood, check out their Pumpkin Spice Rooibos.

Saturday, June 16, 2012

Bacon, Cheddar and Green Onion Scones


     We have a little place in town here that makes wonderful scones.  I'm not one that likes a lot of things in my scones and I generally don't like a lot of fruit in them.  I'm a plain black tea and cream scone kinda girl, but every once in awhile I like some flavor.
     I went into the scone shop one day and they had these green onion, bacon and cheddar scones and I was like, give me six!  (there are only two of us here at home, but I was momentarily overcome.) They were so good!  But the scone place is clear across town and not open on Sunday and Monday.  Therefore on a rainy Sunday afternoon, I was forced to find a recipe.
      The one I liked best was on the King Arthur Flour website and since that is the flour I use, it was perfect! I simplified it and have it for you here.
 Bacon, Cheddar, Green Onion Scones
2 cups  Flour
1 teaspoon salt
1 tablespoon baking powder
2 teaspoons sugar
4 tbs cold  butter
1 cup grated cheddar cheese
1/3 cup  finely diced green onions
1 cup bacon, cooked, cooled, and crumbled
3/4 cup heavy cream (have a little extra incase you need it and for brushing on the scones)
  • Preheat the oven to 425°F. Lightly grease a baking sheet, or line it with parchment.
    Combine the flour, salt, baking powder, and sugar. 
  • Cut the butter into the flour until the mixture is unevenly crumbly.
  • Mix in the cheese, green onions, and bacon.
  • Add cream, stirring to combine. Try squeezing the dough together; if it’s crumbly and won’t hang together, or if there are crumbs remaining in the bottom of the bowl, add more cream until the dough comes together. Transfer to a well-floured work surface.
  • Pat the dough into a smooth 7" circle about ¾" thick.
  • Cut the disk into 8 wedges
  • Lay the wedges a baking pan. 
  • Brush the scones with a bit of cream to brown crust.
  • Bake the scones for 22 to 24 minutes, until they’re golden brown. 
  • Remove them from the oven, and cool. 
  • Serve warm, or at room temperature.
  • Yield: 8 large scones
I serve these with potato cheese soup, or scrambled eggs and fruit, or with whipped or flavored butter for a savory with your daily cuppa.