Friday, June 19, 2009

Tea Notecards


These make not only great invitations for a tea, but if you put four or six in a cello bag with envelopes and tie them with a ribbon, they make a lovely gift. Here are my directions.

****************
Tea Notecards
****************

Supplies:
  • Pattern for tea cup or tea pot (I used a cookie cutter)
  • Cardstock 8 1/2 x 11 (white, parchment or colored)
  • Invitation envelopes 4 1/4 x 5 1/2
  • Flowered cotton material (I use fat quarters)
  • Fusible interfacing (pref. with paper on the back!)
  • Gold paint pen (large)
  • Iron and tacky glue
  • Tea bags with a string
  • Paper punches (optional)

Directions:

1. Cut cardstock in half on the 11 inch side, making two 5 1/2 inch pieces. Fold in half and this is your card. (If you want to get fancy, you can cut the corners or the front edge with decorative scissors or paper punches.)

2. Iron the interfacing to the material.

3. Trace the tea cup and tea pot onto the paper side of the interfacing, following all of the solid lines.

4. Cut-out the tea cup or tea pot along the solid lines. Make a slit along the line near the top of the teacup or teapot (this allows an opening for the pocket to place the tea bag in!).

5. Peel back the paper along the outside 1/2 inch of the tea cup or tea pot and cut the paper off. Cut the paper off the top of the tea cup or teapot from the slit up. Take care to see that you LEAVE PAPER IN THE MIDDLE SO THAT YOU HAVE A POCKET IN WHICH TO NESTLE TO TEA BAG. Then iron (no steam) the tea cup to the front of the card. OR Outline the back edges of the tea cup with tacky glue and affix to the front of the card. Do NOT glue the center of the cup or tea pot! (Embellish as you wish) I cut the bottom front edge with decorative scissors and
embellish the corners with a decorative paper punch.

6. On the front, draw the lip of the cup or the edge of the teapot with the gold pen, following the dotted line (on my pattern) or estimate if you make your own pattern.

7. To make a personalized tag on the string of the tea bag, punch out (I use a paper punch) or cut out two small 1" tea pots from colored paper (print a quote in 8pt. font first if you want) Cut the tag off the tea bag string. Glue the two teapots together, placing the tea bag string in between each small teapot. (this step is optional, you can use a sealed packet of tea instead if you want) To print a personalized quote, I make a grid of 1" squares on my computer and then in 8 point font, print "Tea... will always be the favorite beverage of the intellectual." Thomas De Quincy in every other square. That allows me to have the quote printed on one teapot and it leaves the back side blank.

8. Last but not least, add the bag of tea! You may need to fold-in the bottom of the packet so it will fit neatly into the slot in the tea cup or tea pot.

9. Put the cards with the envelopes in a clear cellophane bag and tie with a pretty ribbon and flower. Makes a great gift!

Here are a few other styles I have made:


Wednesday, June 17, 2009

********************
What is a tea cake?
********************

Although I don't know much about the history of tea cakes, I do know tea was sold in little cakes (they pressed it together to make a hard lump of tea leaves), but they wouldn't be very palatable. Edible tea cakes, better known as cookies or muffins, appear to have come about as a tasty little treat left over when the cooks tested the oven with a bit of cake batter before actually cooking the whole cake. I hope the sites below can shed a little more light on the subject if you are interested.


Here are some links to some tea cake recipes, but first I thought I would start off with my very favorite tea cakes, the Russian Tea Cakes!


********************
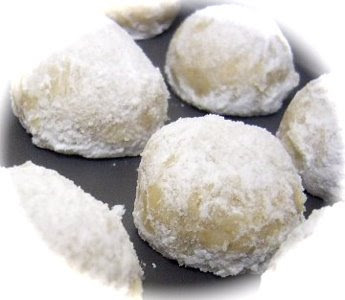
Russian Tea Cakes

********************
  • 1 cup butter
  • 1 teaspoon vanilla extract
  • 6 tablespoons confectioners' sugar
  • 2 cups all-purpose flour
  • 1 cup chopped walnuts
  • 1/3 cup confectioners' sugar for decoration

DIRECTIONS

  1. Preheat oven to 350 degrees F.
  2. In cream butter and vanilla until smooth. Combine the 6 tablespoons confectioners' sugar and flour; stir into the butter mixture until just blended. Mix in the chopped walnuts. Roll dough into 1 inch balls, and place them 2 inches apart on an ungreased cookie sheet.
  3. Bake for 12 minutes in the preheated oven. When cool, roll in remaining confectioners' sugar.


*******************
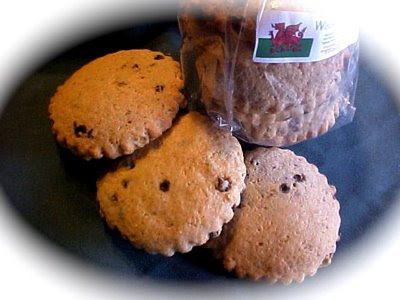
Welsh Tea Cakes
*******************

http://www.virtualcities.com/ons/co/d/cod78014.htm


Old Fashioned Tea Cakes
Bread-like cookies that go with tea time.
http://members.tripod.com/cakerecipes/id32.htm

Grandmother's Tea Cakes
http://baking.about.com/library/recipes/blcoo14.htm

Chocolate Raspberry Tea Cakes
http://www.virtualcities.com/ons/nh/y/nhyb6015.htm

Yorkshire Tea Cakes
http://www.themediadrome.com/content/recipes/tea_cakes.htm

Lemon Teacakes
http://www.he-and-she.com/TeaParty/lemon.html

*********************
Hazelnut Tea Cakes
*********************

1 cup toasted* hazelnuts, very finely ground
1/4 cup powdered sugar
1/4 cup brown sugar
1/2 cup cake flour
1/2 tsp. salt
6 egg whites
1/2 cup melted butter

Mix nuts, sugars, salt and flour together until well blended. Add egg whites. Add melted butter and mix well. Grease a mini-muffin pan. Using a small stainless steel scoop (you can get them from The Pampered Chef or at a kitchen store), fill cups with one scoop. Bake 15 minutes at 400 degrees. Turn oven off but don't remove cakes for another 5 minutes. Cool on a cooling rack for 10 minutes before removing from pan. These can be frozen.

*To toast hazelnuts and remove skins, place the hazelnuts (I do the whole bag, which I purchase at Trader Joe's, so that I have the rest of the hazelnuts ready to use for another recipe. I store them in the freezer) on a pan with sides, bake at 350 for about 20 minutes. The skins should blister. Remove them and cool, then rub them between your palms, and the skins will flake off. There will be parts of the skin that remain, but don't worry about it. Store the extras in an airtight container in the freezer if you won't be using them right away.